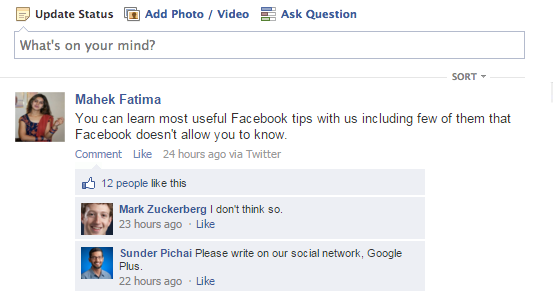
Description: Prank Your Friends by Creating Fake Facebook Status Updates along with Fake Comments. You Can Also Create Fake Chat Message by Facebook Chat Message Generator.
Do you want to prank your friends? Today, I am sharing a cool Facebook tips that will let you create fake Facebook Wall posts to your and your friends timeline followed by Facebook comments. You can also create a fake Facebook status update of your friends and show them to fool them. In case you missed my guide to create fake Twitter tweets, you can check it out. There are many tools to create fake Facebook wall posts but I am only considering here the best one. While creating fake status, you can add friend's name, status update or comments and their profile photo. The best thing using the following tool is that you can add your friend's profile photo using the image's direct link so you don't need to download it for using it later. Therefore, here is a guide to create faking Facebook wall posts or fake Facebook chat messages history.

Related Facebook Tricks:

Related Facebook Tricks:
- All Useful Facebook Tricks for 2016 at Once
- Learn Most Useful Commonly Spoken Slang Words like LOL, ASP
- Fancy Text Generator for Facebook & Google Plus
- Write Hindi on Facebook & Google Plus
- Read Facebook Messages Without Showing Seen to Freinds
How to Create Fake Facebook Wall Posts / Status Updates with Comments
- Go to http://fakeconvos.com/ link, and click on 'Log in with Facebook'. Facebook will ask you to give the permission to the application, simply click on "Okay".
- Now, click on "Create a new Convo" or '+Create' to make your first fake Facebook status update along with fake comments.

As shown in the above screenshot, write the name of commenter (It would be associated with status update).
Keep in mind, first time you fill up all the details it would be a status update. Next time, the entire fill up details belong to comments.
Choose an image: You can either upload a profile picture from your computer or you can use direct link of an image. Let you want to make a fake conversation with a friend and you want to use their current profile picture then just go to your friend's timeline and click on their profile picture, now right click on the profile picture and click on "copy image location", come back to the site and paste it to the desired field. Look on the screenshot "Direct Link of image".
Their Comment: Write the text you want to show along with the commenter. - Once you have filled up all the details, finally, click on "Add to Stream". It would be a comment of your status update. You can add more comments, similarly.
- Once you have created your fake status update along with comments, give it a title and save it. You can view it anytime into your Fake convos account by Account -> My Convos.

- Now go to your convos, and select the status you want to share. Take a screenshot (If you don't know, press "Print Scr" from your keyboard, open "Paint" and press "Ctrl + V", and finally crop the image).
- Once you have screenshot to your hard drive, you can share it anywhere on the web like Facebook, Twitter and Google Plus.
How to Create Fake Facebook Chat Message History
Fake convos, as discussed earlier, doesn't allow you to making fake your Facebook chat.I will use another source to fake our Facebook chat history.- Go to http://simitator.com/ link, it will open in a new tab. In simitator, you will also fill up the details of both commenters. Follow the simple steps.
- Fill up the details of "Person 1" and "Person 2" as their name and profile picture (You have to download profile picture of your friend to your system so that you can upload it here).

- Now, you can switch "Person 1" to "Person 2" or vice versa anytime by clicking on the associated tab. Now select a tab and write your message and hit "Add message". It will be added to the conversation and similarly select the other tab and write message and hit "Add message", it will also add to the current conversation. You can similarly add more replies to the current chat.
- Keep in mind, you can also add a separator line followed by date or day anytime in the conversation by selecting the third tab "Date".
- Once you have finished. You can take a screenshot. That's it!


